In my last post on film photography I talked about finding the perfect film camera. This time I’m gonna talk about the process and the aesthetic and give you an insight into where I’m at now with my film photography.
SHOOTING FILM
I’ve wound up using an SLR for most of my film photography, and I have really enjoyed using a fully manual camera. You feel kind of connected with the process when you have to choose all the settings yourself. I’m a bit of a control freak anyway, so I liked that I was the master of my destiny – which is more than can be said when you’re using a compact film camera.
DEVELOPING
Throughout all my experiments, I’ve been developing and scanning my own film at home. I was initially super excited about it all, and even wrote a gushing blog post that was published over on Japan Camera Hunter about the magic of developing my first roll of colour film. At first I couldn’t wait to develop and scan my film, and would be in the kitchen dispensing chemicals as soon as the latest roll was done. As I expected though, this soon became a bit of a chore and I’ve found I’m going longer between developing sessions, often waiting until I have multiple rolls to develop. I had kind of prepared for this inevitability by buying a developing tank that could do five rolls at once, so it wasn’t really a problem. I think waiting a while before developing actually allowed me to review the photos more subjectively and without having my opinion of the shots affected by the excitement of a fresh roll.
Developing film at home is way easier than I thought it would be. There’s a lot of geeky anal-retentive types on the internet that make out that developing film is like some dark art that only a true master of zen photography can carry out. For colour film they make it sound like you need a doctorate in chemistry or something. Truth is, if you can spare an evening or two of googling, do a little research and watch some youtube videos, it really is a piece of cake. If you can read a stopwatch and a thermometer and pour chemicals in and out of a tank, then you can develop film yourself. It’s really no harder than making a cup of tea. Just do your research and take your time and it’s very difficult to screw up.
Here’s one of the best film developing tutorials I found. Matt Day’s Youtube channel has some really informative content on film photography – go check it out.
SCANNING
What I wasn’t expecting was that the developing part would be the easy bit, and that scanning would be a complete pain in the arse. Scanning is a slow process, so trial and error takes a long time. I’ve tried a few different colour films but I’ve been having terrible problems with ‘lateral curl’ when it dries. This is caused by the emulsion on one side of the film base contracting when it dries out, causing the top and bottom of the film to curl between the sprocket holes. What this means is that the film won’t lie flat and it causes problems when you try to scan your negatives. The scanner needs a flat negative in order to focus properly on the image. In my case the top and bottom of each frame is relatively flat, but the central part is sitting about 2mm higher due to the curl in the film. What this means is that when I scan the negs, the top and bottom of each frame are in focus, but the central part isn’t.
Despite having a scanner capable of 5000dpi scans, this kind of ruins the picture. A different scanner, like a flatbed with negative holders, would probably remedy this issue but I purposely got a scanner that could auto-feed and scan a whole roll of film to try and cut down on the user input required between scans. I could set the scanner off and go to bed and wake up in the morning to some fresh, if somewhat blurry, scans. Moving to a flat bed would mean sitting at the computer for a long time watching over the scans and switching out negative strips. I tried a couple of things to try to reduce the curling, like using proper film drying clips and drying the film in a humid environment. Neither seemed to work very well. I even tried cutting the negatives into strips and putting them under something heavy for a few days. Whilst this gave the best results, having to scan short strips of negatives meant more time at the computer.
If anyone knows of a colour film stock that dries flat then please let me know what it is. I’ve done a lot of hunting on the internet but can’t find anything. I did find reports that Ilford HP5 black and white film dried nice and flat though. I bought a 30m roll and learned to bulk roll my own film canisters. That’s something else I’d never tried but was surprised to find is very straightforward.
Travis Mortz’s youtube channel is another great resource for film photography stuff.
I can confirm that HP5 does indeed dry very flat and I’ve been getting good scans from it. Now, when I started this journey I had no intention of trying black and white film. It just so happened that at the time I had an idea for a project that seemed to lend itself to being shot in black and white, so it kind of worked out nicely in that respect.
THE AESTHETIC
What I came to realise was this: film is nowhere near as sharp as digital. Even when I’d taken the time to really focus accurately, had used a flash and shot at f16, there was still an inherent softness to the images. Even after the negatives were flattened out there is just an inherent softness to the medium. The photos are a bit too ‘nice’ looking. I like my photos brash and kind of ugly looking, and since my switch to film was primarily about the aesthetic, this had become a bit of a sticking point. I’m sure there must be a way to get sharp images from a film negative, I mean – everyone used them back in the day, right? – but developing and scanning at home I was certainly having issues and sending film out for professional scanning at twenty quid a roll was out of the question – besides that, scanning is important in how the photos end up looking and by sending your film off you’re effectively handing that job over to a stranger.

Trolley Park, Chester
Even when things were at the their best with colour film I still wasn’t really pleased with the results. One of my reasons for moving to film was to reduce the time spent post-processing images. With home scanning though I’ve probably spent longer post-processing my film shots than I ever did with digital. Although the colours are usually ok and don’t need much work, you often get weird red/blue/green colour shifts that can take some time to correct. At the very least, every frame requires cropping and exposure adjustments as well as setting the black and white points.
I somewhat naively thought that with film it would just be a case of scanning the roll and that was it. I mean I never expected it to be quick but I was hoping the photo would be ‘finished’ as soon as I was done scanning, but alas that’s not the case. The biggest issue though is that the ‘pretty’ look of film just doesn’t seem to sit will with my aesthetic desires. Colour film is generally pretty slow, with most being around ISO 200-400. Unless you’re outside on a sunny day, this means you often end up shooting with a fairly wide aperture, and I’ve never really been a fan of bokeh in my photos. So for colour photography, I’ve kind of shelved the idea of shooting film for the time being.
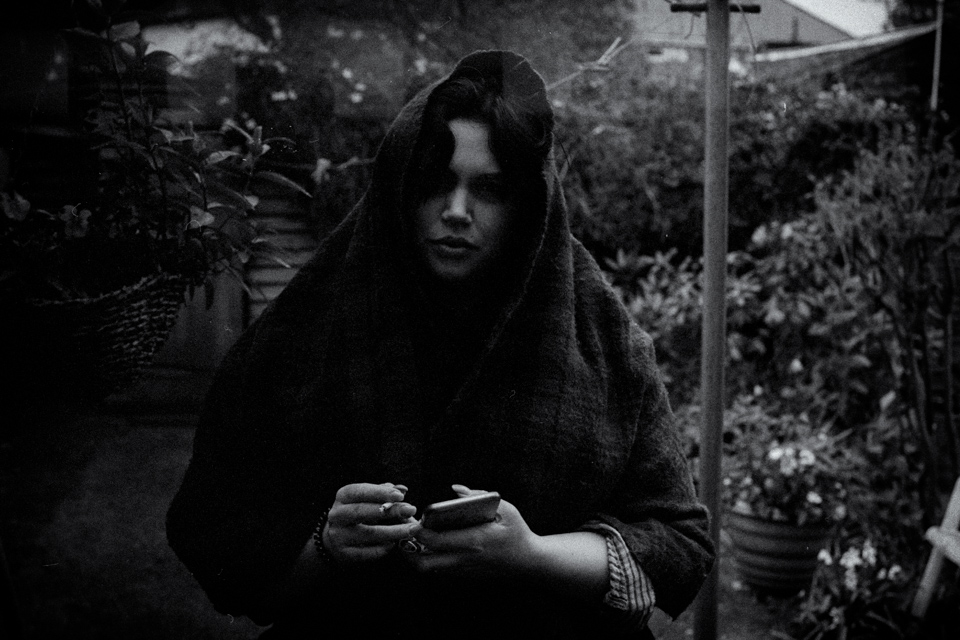
Faye, Birmingham
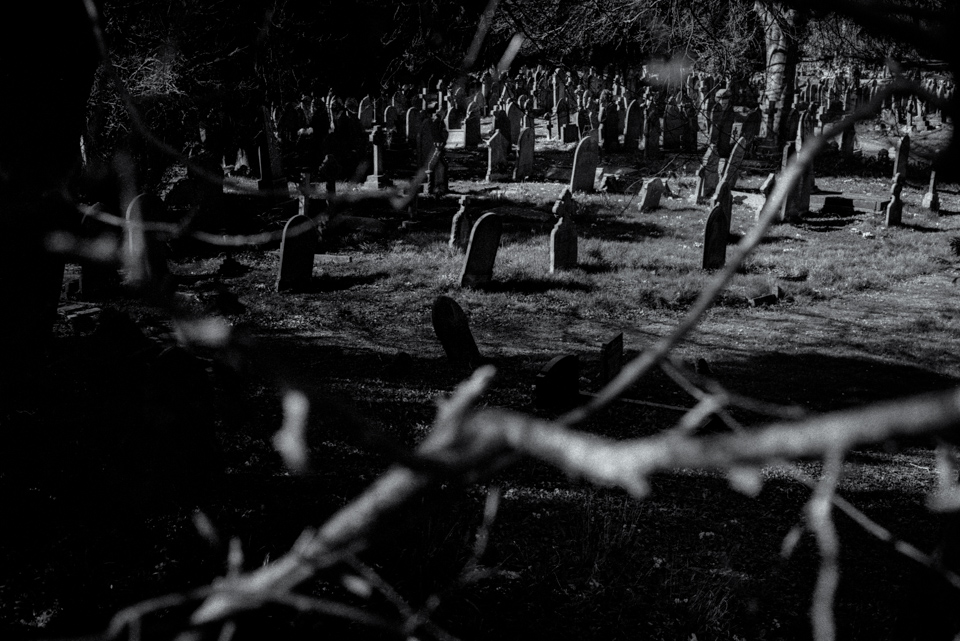
Graveyard, Chester
My shift to black and white film has kind of made a few of my expectations of film somewhat irrelevant. The type of photos I’m taking on black and white film are different to what I would normally shoot. I’m shooting a lot more in low light, I’m shooting a 50mm lens without flash, and using wider apertures. I’m finding the softness of film lends itself well to these types of dreamy images. I’m happy with where I’m at in terms of black and white, but I’m not sure whether I will continue to shoot it once this project I am working on is done. Besides that, I’m not sure how well the project is panning out but that’s a story for another day. I do love shooting my dad’s camera though, and black and white allows me to do that – so that’s something I guess.
IN SUMMARY
I realised I’ve put a lot of work this year into finding something that worked for me. Five months have passed where I haven’t been able to focus on making good photos. All the focus has been on finding the right combination of camera, film and scanning for my work. In the end, I kind of just got sick of all the messing around and wanted to go back to just making photos again. So what next?
Comments 8